Category Archives: Mama’s Craft Room

And Wheeee!!

And Wheeee!!

Let me start from where is all stands RIGHT NOW. I have three-count them-three unfinished pieces sitting on my desk waiting to be finished. Oy! I’m very excited about them. They’re turning out just as I pictured them in my head, and as I work on them, I think to myself, why didn’t I start doing this kind of thing years ago?! I find the energy flowing through my hands, forming metal and wire into the exact images in my head and I have never quite been able to grasp that. I gave up trying to draw because I cannot draw in 3D. Only in some fiber arts have I been close to being this successful in matching my brain to reality. It’s a cool feeling.

On top of those three awaiting final touches, I finished TWO more! These are now listed for sale from Mama’s Craft Room on Etsy! Check. Them. Out!

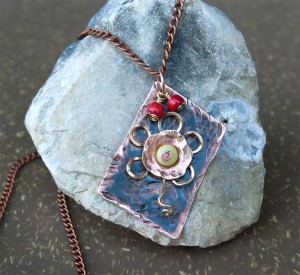
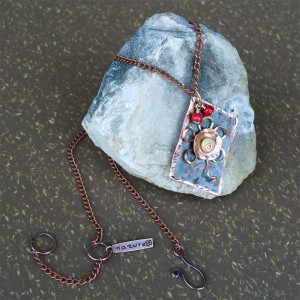
Here is my Flower on Copper, that began as an experiment, and when I saw it was turning out exactly as I was hoping, I kept going with it to see what would become of it. I was pleasantly surprised!
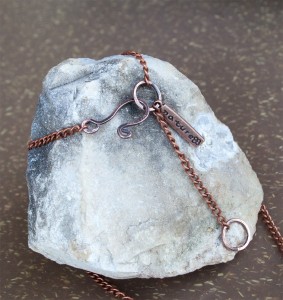
A darling red brass, copper and pineapple jasper flower graces a hand textured abstract copper piece that has had a patina applied, and then buffed to a shine. Sweet little red corral dangles give a startling contrast that draws the eye in. The chain is approximately 18.5 inches long including the clasp, with a 2 inch extension, and the pendant measures approximately two inches long. A surprise little copper accent tag was added to the hand forged clasp. A light coat of polyurethane was added to the pendant help preserve the patina in its current state.
 

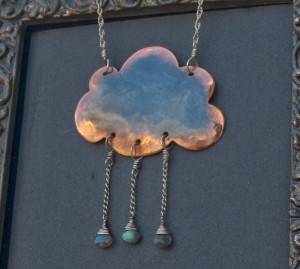
The work on this was an experiment to see how the patina/tarnishing would look on a long drawn-out project-El Nino!
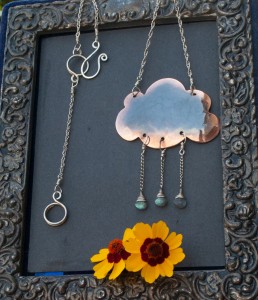
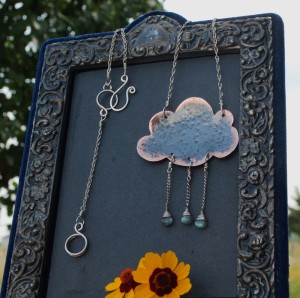
Not every cloud has a silver lining! El Nino has a copper lining under a soft patina, hand buffed to bring out the shine. This solid copper cloud has sweet little labradorite raindrops that drizzle down on sterling silver. The pendant hangs on a sterling silver chain, with hand-crafted sterling silver clasps. It is very hard to show the depth of the patina on this highly polished, reflective surface, but in person, it is something to behold. Hand-forged and textured on the back, giving faint, lofty details to the front, and a more dramatic look to the back, which also has had a patina applied. I personally would wear this either way! If it is too shiny for your taste, don’t do anything-handle it a bit, and set it aside, and a richer, deeper patina will develop. Love that shine? Just rub gently with a soft cloth-tee-shirt material is best! And it will shine like new again.

All but the cloud is sterling silver that has been lightly oxidized and polished to bring out a nice, light shine to the high points. The necklace, including the width of the cloud, measures approximately 20.5 inches, with an extension measuring approximately two inches. From the top of the cloud, to the bottom of the labradoriate drops is approximately 2.5 inches, and at its widest part, approximately 2.25 inches. The labradorite has great flash to it, and the entire piece is very light-weight.

This past week has been fun! Two sales! Wow! Thank you, thank you! Hopefully, over the next week, I will get the other three listed, and will share my adventures in their creation with you. I haven’t forgotten to tell you what ever happened to that red banded jasper cab I wrapped. It’s just that the story isn’t finished yet…. So, stay tuned! And if you’re any where in the southern US, keep cool, y’all! =^..^=
 

Busy, busy!

Busy, busy!

Well, after my whirlwind weekend in Ohio for M&A’s wedding (pics to follow), the first thing I did Tuesday morning was to retreat to my Craft Room and get busy on an idea that I came up with while dozing on the plane.  I actually came up with quite a few! It seems the altitude really cleared my mind, and I came home full of new inspiration and itching to get busy. So, I spent Tuesday and Wednesday working on the first new piece, and enlisted the help of Tim, who shall now be known as the Brawn to my Brain, and together we made some VERY awesome links to be used in the new necklace. I purposely had him make extra, as I didn’t think I would stop at putting them in just one necklace! I plan on listing it, and won’t reveal it yet, as I ran into a slight, *ahem* snag…. But first, let’s get to Thursday!

Every month, I look forward to the one day where I get to go out, sans enfants, and consort with fellow jewelry-making enthusiasts, incredible jewelry designers, and extremely giving, talented artists. These ladies take time out of their very busy lives, to meet once a month and offer guidance, instruction, encouragement, and general camaraderie to jewelry makers of all skill levels from beginner to expert. I find meeting with the group inspirational, heart-warming, and overall good for my soul. Anyway. This month, Carolyn of Kooky Kardinal and Shirley demonstrated the use of alcohol inks, embossing and “enameling” using simple techniques that give stunning results. Shirley prefers the torch method when using enameling powders on metal and even rocks! I never would have thought it! I haven’t had a chance to make use of the rock idea yet, but it is definitely on my to-do list. We used a Cuttlebug and its embossing folders to emboss thinner metals-32 gauge I believe, and Carolyn has found that the embossing folders can be used with a chasing hammer and bench block! I love that idea, since I’m not that into paper crafts, and would not want to have to buy the Cuttlebug just for this reason. I heard that. I prefer the term “frugal” 🙂

The enameling we did was not the traditional enamel used on metals. Instead, we used embossing powders made for use on paper, usually in scrapbooking! How clever!! I really got into that, since it gives such a quick, dramatic result. After cutting out shapes using the bigger, heavy duty paper punches, also made for scrapbooking, out of the 32 gauge copper and brass, I embossed the shapes with the embossing folders, and tried “enameling” just the relief. That was a bit of a challenge, but had some good results. Later, Carolyn mentioned that there were “embossing pens”-pens made to draw a picture or pattern onto whatever you are embossing, before you add the powder. Up until then, we were using just the stamp pads of StazOn-sticky stuff that adheres the embossing powders to whatever you’re embossing until you use a heat gun (or torch!) to melt the powder. Well, it comes in pen form, and Hobby Lobby had it! Needless to say, I spent a bit of time after class picking up a few items that were 30% off, and used a 40% off coupon to get something NOT on sale. Never pay full price. 🙂

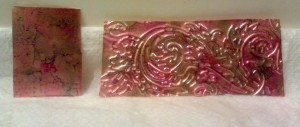
I want to play more with alcohol inks. I love the marble look they can give, as well as the very random, unexpected patina they can create. Back when we had the Cold Connections class with Karen Meador, Ph. D., of Dreamcatcher Designs TX , she had prepared some copper blanks and other findings, and I selected one that she had used alcohol ink on, and sealed with a clear gloss. I was enthralled by the depth of colors in that little circle of copper, and ever since have been itching to try the technique. I waited too long to play with the alcohol inks, but I did get to marble two pieces-one that I embossed using an embossing folder, and a plain flat piece of rectangular copper. A light coat of Renaissance Wax was added afterwards and polished off with no harm to the marbling effect. I will spray it with clear gloss to seal it when I get a chance, but I think Karen only used a clear gloss, so we will see how it turns out. Here are a few pictures of my experiments. When I got home, I added a few more little details using the supplies I picked up after class, including-are you ready for this-a CLEAR embossing powder!! I gives a great final layer, I think, adding just a little more weight without having to add more color!

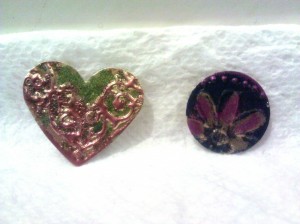
This was done on brass that had been embossed with the Cuttlebug embossing folders.

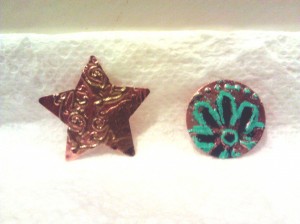
These were embossed first too, and then enameled. I tried to just get the relief, and found out at home it is MUCH easier to accomplish if I use the StazOn pen!

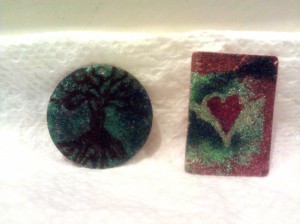
These two I did the most extra work on after I got home. The tree of life was added to the round piece, and then cover with the clear. The heart was drawn on, and then the outline of the heart and wings. It took two tries for it to be more visible, but I think I like it.

On the left is a heavier gauge, 22 I think, and I only inked it, and then waxed. One the right, I embossed first, and then dabbed the inks, and waxed. They look prettier in person.

My favorites obviously, are the tree of life and the heart. The tree makes me think of Shannon of Vixen’s Natural Jewelry! The heart makes me think of Valerie Rose. It will end up as a pendant, but I had still many ideas that I want to try out before it is completed. Thank you Carolyn and Shirley!! The class was great fun and you did marvelously! Oh, and since much of what I make ends up with my kids, especially a certain four-year-old who still feels a need to put everything in her mouth, I tested a spot on these and found that the enameling could be scraped off. Something to keep in mind, if you plan on making anything intended for children.

Moving on. On Tuesday, I had set the goal of listing at least one item, if not two, by Friday. Needless to say that did not happen. Not for lack of getting the job done. No, this was something I didn’t expect. As you may well know, if you’ve read earlier posts, Tim and I have a passion for spending hours upon hours scouring local scrap yards for all sorts of fun, interesting, and otherwise unwanted by anyone else but much NEEDED by us, metals of all shapes, dimensions and alloy content. Well, after spending two days on a labor of love on the design I mentioned, I was ready to add the patina, polish, and list. You know that moment, when you add the item to the patina agent, full of hopes and dreams, breathless anticipation, and eagerness to finish this piece so you can move on to the Next Great Idea that you have? Only to rinse thoroughly, and find that the wire you painstakingly reclaimed or otherwise recycled, has a coating or resistance on it. I tried a brass brush. I tried steel wool. I tried sand paper. All to no avail. So, while the chain looks fantastic, I’m left with a great idea that doesn’t match! Ok. No problem, I tried telling myself. Hoping I could avoid slipping into a dark place in my head. I’ll just copy it, and make a new one. Only to find that all my smaller gauge wire is tarnish resistant!! I was ready to fall over twitching. I called the first place that came to mind, that Tim sort of passes on his way home from work-yes they had bare copper wire in the requested size and shape, AND they would hold it for me as I asked, since it was Their Very Last Pack. “Are you SURE it’s bare copper wire?? No tarnish resistant, no coating, no nothing??” I asked. “Well, I’m pretty sure it is solid, bare copper wire, judging by the fact that is does NOT say tarnish-resistant on the package, and it has an anti-tarnish strip in the bag with it, and despite that, it is heavily tarnished….”
Sure enough, it was just what I needed. Only, about one gauge smaller………… Oh well, I used it anyway, and it is tumbling as we speak in effort to work-harden it, since I annealed it before using the half-hard wire. Hopefully, I will get to list it tomorrow, and share it with you here.

As promised, here are a few pictures from the wedding, including a few from the next day. I decided to include them, because I see photography as another art form, another craft, so to speak. I hope you like them as much as I do.
 

From the top left: A and her sweet Mama, M&A,  and my handsome date, Adler. I do believe she liked her necklace!  Here are pictures from Edgewater Park the next day:

The newly weds by the willow at sunset, a nifty sunset shot, and Giant Baby-playing with perspective. My dad used to take me to Edgewater Park, so it made spending some moments there with them very special. <3

Well, that’s it for my adventures this week. It went by so fast, and I enjoyed every minute of it. I hope you, too, have enjoyed this week’s installment of Mama’s Craft Room, brought to you by the Crafthopper. =^..^=

New Listing!

New Listing!

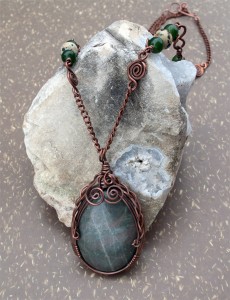
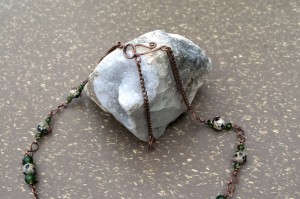
So I have finally finished the necklace that goes to the bloodstone cab I wrapped awhile back and that I made the chain for with green aventurine and dalmatian jasper!  I have listed it on my Etsy shop with much trepidation.  It is my first wire-work listing, and I spent waaayyyyyy too many hours looking up comparative listings, to come up with an average for the price, and to compare my work with that of others’. I finally settled on a price I felt comfortable with, and went ahead with the listing.  Here’s a peak:

Amazingly talented Shannon of Vixen’s Natural Jewelry on both Etsy and Artfire (who is also a major source of inspiration to me)  commented that it reminds her of a fairy tale mirror, and I love that description!  Gazing into it, you do get the feeling that a face is going to faintly surface and show itself… (Check out Shannon’s pages!! She has some incredibly beautiful items listed!)

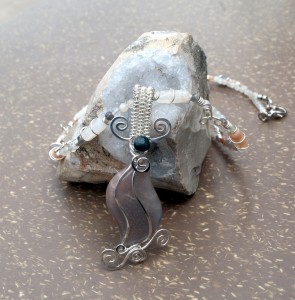
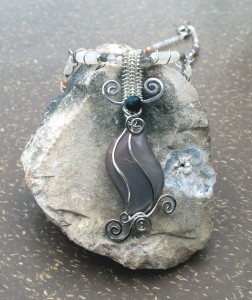
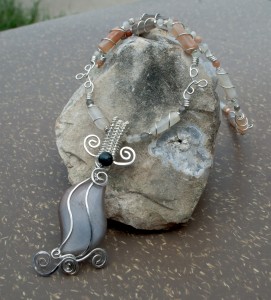
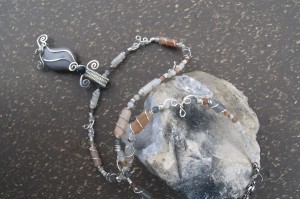
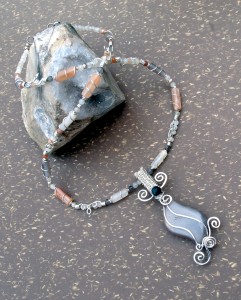
On another note, I have finished A’s necklace, just in the nick of time! Here are some pictures I snagged today while it was perfectly partly cloudy:

I hope she likes it! Moonstone rounds, tubes and the focal-a moonstone marquis in peach, grey and milky-white, all from the great bead people at Magpie Gemstones! I cannot express more sincerely how lucky I feel to have found them! Sterling silver intermingles throughout the necklace, accenting and highlighting the gentle grace of the moonstones.

I had planned to try and get all creative and had a great idea for the perfect, handmade card for M&A to congratulate them on their marriage, and to give them a keepsake the could cherish for years to come, but it seems my plans have fallen through once again. I am The Great Procrastinator, after all! =^..^=
Tutorials, Progress and Time Machines..

Tutorials, Progress and Time Machines..

Oh my! I have a dire need to share some great tutorials that I am VERY fortunate to know of. There will be a series of them, on-going, and I am lucky enough to actually know the very talented, generous people putting the tutorials together. Szarka at Magpie Gemstones is paving the way for new wirecrafters. There have always been tutorials on the Magpie Gemstones website, but now Szarka, along with Karen Meador, Ph.D. of Dreamcatcher Designs TX and others, is offering a series of more in-depth, detailed tutorials to really help newbies learn the ropes..err..wires? The latest installment includes Make Your Own Jump Rings, How to Wrap a Loop, and a nifty youtube video of Szarka herself showing us all How To Make Wire Clasps! If you’re a seasoned wire-worker, why not read these tutorials with an open mind, and break away from the standard, traditional configurations, and come up with new designs or patterns? Or maybe you can pick up a trick or two you hadn’t thought of before. Here is what I worked on:

Not only does Szarka provide beautiful, great quality beads and gemstones at prices unheard of, tutorials and guidance covering a broad range of topics pertaining to the jewelry-making and selling world, she has a website dedicated to her own gorgeous jewelry creations!

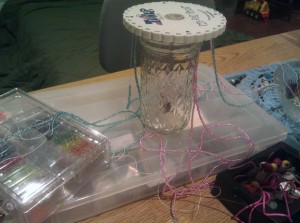
Next on the roster, Kumihimo, revisited. Since I live by the “See one, Do one, Teach one” adage, I invited L to learn the great joys of tangling wires up into knots while flinging beads all over the room Kumihimo. I finally found Fireline at Cabellas and then decided to get a different, more affordable brand. After much trepidation, hesitation, and hours of stringing tiny seed beads onto Fireline, L was ready to start! I messed up her pattern for her at some point, but I think it’ll still turn out great, and she decided she liked it as it was (I think she was afraid she’d have to string more beads):

In retrospect, I should probably have had her only string a couple inches worth of beads to start….. 😉
While L did that, I was busy working away on the moonstone necklace for A, my soon to be sister in law:


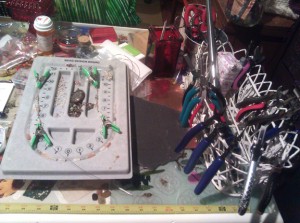
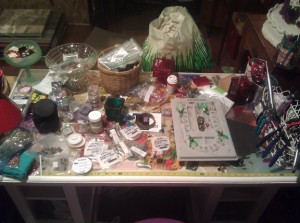
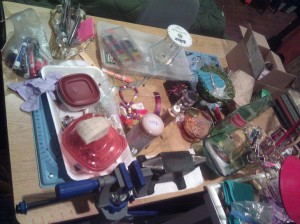
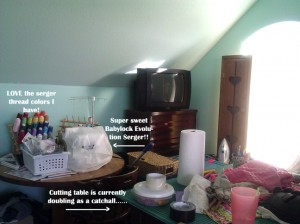
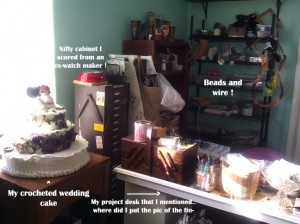
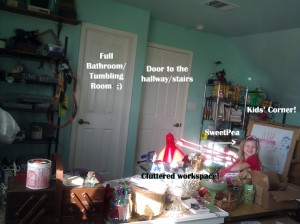
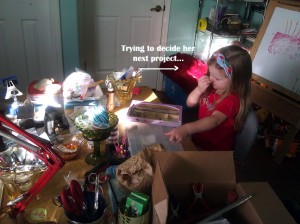
Here are a couple of pictures of my work space:

Where I actually sit, facing this desk.

Second work area to my left, with more essentials.

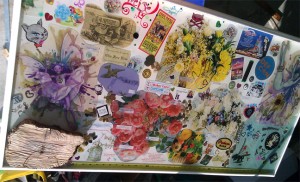
Oh! And before I forget, here is a could-be-better picture of the desktop collage I made, embedding everything in epoxy resin:

Memories in Epoxy.

I have since tidied up my work space even more, but don’t yet have more pictures to prove it 😉
“What about the aforementioned time machine?” you may be asking. Well, who wouldn’t want a time machine? We could go back, and update blogs when things actually happened, rather than a week later. We could see the future and know what things will sell and what won’t in our Etsy shops, so we don’t waste precious time on things that people simply aren’t interested in. We could give a few extra hugs where needed, to help our days run smoother. But until then gentle viewers, we must remember to cherish every second we have, and remember to stop and smell the roses. =^..^=
Two steps forward…

Two steps forward…

One step back? That’s how it seems when one is organizing a Craft Room!! Today’s installation of The Crafthopper News will feature updates on Mama’s Craft Room, the W00T from ZeroLandFill Austin last weekend, as well as a few crafty things that happened thereafter.
First up, Craft Room Pictures:
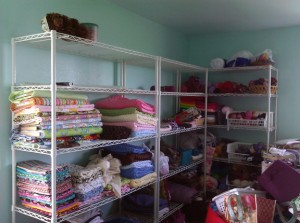
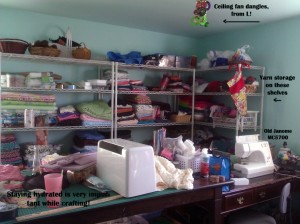
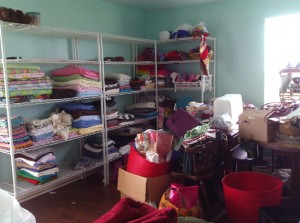
After I finally finished painting, I was worried I would lose momentum, and fizzle out. So I rushed to buy shelving, and decided wire shelves that can hold up to 300lbs per shelf would be best for my fabrics. Fabric can be VERY HEAVY!! I had always wanted to paint the room a “robin egg blue” and in the end, I used two colors-Serendipity for the main wall color, and Oasis for the slanted wall and ceiling. What perfect color names for my Craft Room!

Fabric Storage


That is a closeup picture. To help create the illusion that I had it all going on by that point. In reality, the room was in utter chaos! I had moved everything to the center of the room to paint, and now had also added to the chaos by pulling out every box, bag, or otherwise storage device full of fabric and started sorting through it. The mid-result looked like this:

Fabric storage in progress


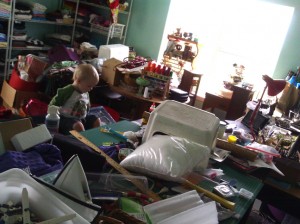
Not too bad, I suppose, but if you really, really want to know how hard it is to “organize” a Craft Room, take a look at the Chaos that greeted one when one walked through the door:

Utter Chaos


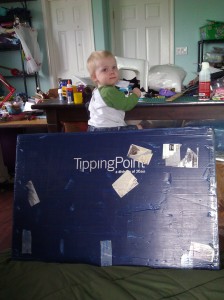
Crazy, amrite?? To confound things just a little further, I had much assistance from my little helpers:

Mama's Helper


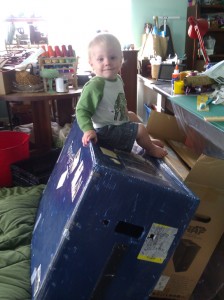
He was quite proud of himself for climbing up onto that box, that yes, contained my yarn. Well, some ..of…my yarn. 😉

Proud


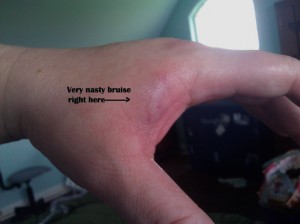
During the assembly of the shelves, I only suffered one serious injury when I tried to move one of those little plastic pieces up that supports the shelves on the correct groove, and didn’t want to take the entire thing apart, so I thought I could get away with just loosening up one corner, and pushing the plastic piece up, but then when I hammered up, it came right back down, pinching my hand in the process:

Ouch.


Now, those pictures are from two weeks ago. Remember the beginning of this post, when I said something about two steps forward, one step back? Here’s are a few more pictures, taken last week:

Sewing Area


In the opposite corner, there is a bit of chaos going on as well:

chaos corner


On the opposite side of the room, in one corner, is where the jewelry-making is attempted. Notice I didn’t say “happens”? After yesterday’s fiasco, I can’t say anything gets made. More on that later.

Looking across to the other corner, you can see the Kids’ Corner:

Valerie has claimed Her Seat in the jewelry-making area:

She has made several very sweet necklaces, and is currently working on some rainbow room decor. Pics to come.
So you can see, the more organized I get, the more unorganized I my space becomes! Hopefully, I will have better organized pictures for you soon. Moving the cutting table to its rightful spot in the room sure helped with productivity, and seeing most of my fabric and other materials out inspires me and moves me to create. So far, all I have created is a bigger mess. 🙂

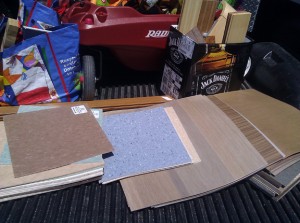
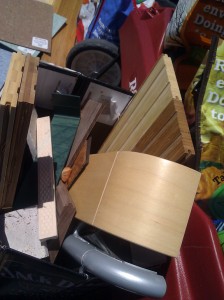
Next up, ZeroLandFill Austin! Here is a few quick pics of our loot:
Here is a picture of the vinyl flooring squares and large ceramic tiles we got:

Vinyl flooring, a few large tiles, and carpet squares!


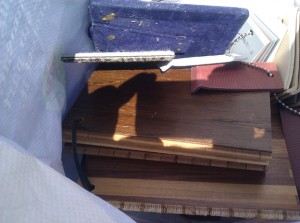
Here is a picture of the wood flooring sample we scored that Tim can use to fabricate knife handles, since they are solid wood!

And:

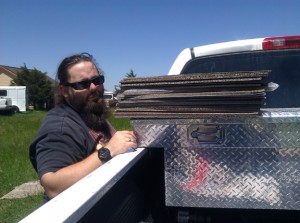
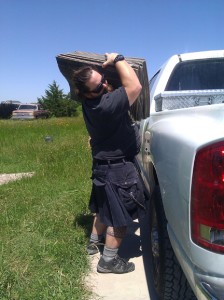
We were afraid the carpet tiles would blow away while we drove, so we tucked them up under the truck box. Here they are, after being pulled out and stacked up. BTW, carpet tiles are HEAVY, and should only be carried by The Muscle:

That’s his “Don’t post my picture on Facebook” face. Good thing I’m only posting it on my blog! It’s always important to use proper body mechanics when lifting heavy things: Feet firmly planted in a wide stance, lift with your legs, not your back, and always, always make sure you have a great kilt on!

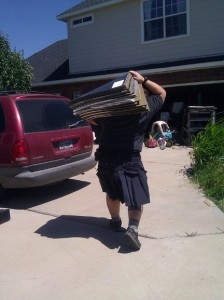
When transporting carpet tiles from one area to another, sometimes the “one-shoulder” technique helps:

Oh, how I love my burly Strong-man! *Swoon*! Ok, I guess that’s enough torture for him for one day!
Here is what I have done so far with our findings:

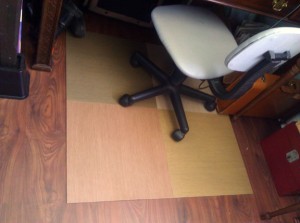
Chair mat under my sewing chair


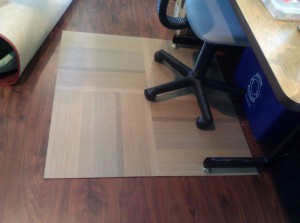
Chair mat under jewelry table chair


So you see, we have started to put them to good use! I duct taped them together, and they have made a huge difference in how well these chairs roll! No more scratching up my laminate.
The carpet squares will also be joined in a similar fashion and are going to replace the worn-out living room rug. It has served us well.

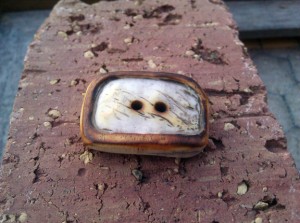
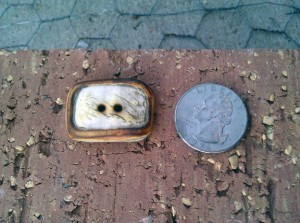
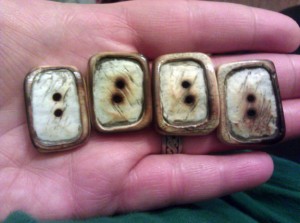
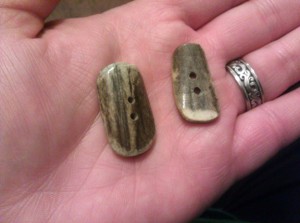
Other crafting news, Tim has discovered a new talent for carving bone! So far, he has made bone buttons:

First bone button

He made four all together.


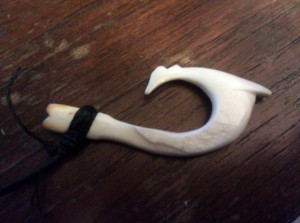
In addition, he carved a couple hei matau or bone fish-hook. He did a great job!

Hei matau


He has also been making antler buttons, from deer he hunted himself:

Antler buttons


I have been thinking about listing these all, but gosh darnit, I’m having a hard time parting with them! I keep telling myself, he can make more! But there is something about that very “first one” that just makes you want to hold on to it..
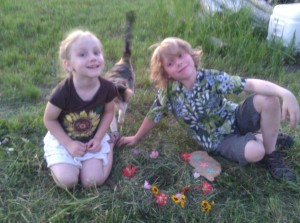
In other news, the kids have been busy building nests to “get more birds or wildlife to move to our yard…..” Complete with glow-in-the-dark stars on a slice of oak:

Nest


So proud of themselves.

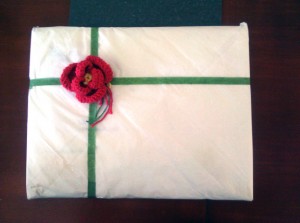
It was L’s birthday the 15th, and when she was on her way over for her birthday dinner, I realized I didn’t have any birthday wrapping paper, or bag that would fit her present. So I scavenged my Craft Room, and here’s what I came up with:

Yes, this is what happens when a crafthopper realizes she doesn’t have wrapping paper: 4 layers of tissue paper, green floral tape accented with a handmade, crochet flower left over from my wedding! =D

I’m going to sign off for now. This has been an all day writing and a certain someone is making it difficult to do much more to it right now. In the next installment, I will follow up on the jewelry-making fiasco this past week, as well as pictures of Valerie’s creations, Weise’s awesome designs, and hopefully, pictures of a much more organized, clean Craft Room!
Til then my friends, peace-out! =^..^=